Shopify resizes images, but it doesn’t compress them. Learn how to reduce image file size the right way using compression, not resizing, to boost page speed, mobile UX, and conversions.
Key Takeaways
→ Shopify resizes images automatically, so manual resizing is rarely needed—compression is what actually improves performance.
→ Uploading uncompressed images bloats your store, even if they’re displayed smaller. Compression reduces file weight without losing visual quality.
→ A smart compression workflow saves time and boosts speed, especially when automated through tools like Hyperspeed.
Why Image Optimization Matters in Shopify
Let’s be honest: image size still matters in Shopify — just not in the way most people think. Yes, Shopify automatically resizes images and serves WebP where it can, and that helps. But none of that fixes a simple, overlooked issue: uploading bloated, uncompressed files in the first place.

Think of Shopify like a chef. You give it the ingredients (your images), and it plates them for the customer. But if you hand it a 5MB product photo straight from your camera roll, you’re asking it to prep a meal using frozen bricks. Even if it slices and serves a smaller version, that massive file still needs to be stored, processed, and delivered — adding friction every step of the way.
Every second counts when it comes to page load time. That high-res lifestyle banner might be beautiful, but if it isn’t compressed before upload, it’s slowing things down — especially on mobile. And in ecommerce, slower = lost sales.
So if resizing isn’t the priority, what is?
Compression.
And that’s where most store owners are still getting it wrong.
Why Shopify Merchants Don’t Need to Resize Manually
One of the most common myths in Shopify image optimization is that you need to resize every image to the exact pixel width of where it will be displayed.
You don’t.

Shopify automatically generates and serves multiple sizes of every image you upload. These variants are pulled in based on screen size, layout, and resolution. The result? Whether someone’s browsing on a desktop, tablet, or phone, they’re seeing a version of the image optimized for their device — not the full-size original.
This dynamic image rendering saves you hours of manual work. You don’t need to resize image size to 400px, 600px, 1200px… Shopify handles that for you behind the scenes.
That said, it doesn’t mean your job is done — because the original file still matters. And that brings us to the real lever you control.
The Real Optimization Step: Compress Before You Upload
Here’s where your optimization efforts should actually go: compression.

Shopify does not compress your uploaded images. It stores them as-is. That means if you upload a beautiful, uncompressed 6MB JPEG, you’re storing and serving that full-weight file — even if only a resized version is displayed. It’s like putting bricks in your carry-on luggage and hoping the airline won’t notice.
Compression tools work by stripping out unnecessary data from an image file — things like metadata, overly fine detail, and unused color profiles. The best part? You can shrink file size dramatically without making the image look worse.
For example:
- A 2MB JPEG can usually be compressed down to 200–300KB without visible quality loss.
- A PNG with transparency might be shrunk by 50–70% using modern tools.
- WebP images (which Shopify serves when it can) benefit even more when the original upload is small.
When you compress before uploading, you’re lightening the load at the source, and that’s a good way to reduce image file size. That helps Shopify’s image system work better, makes your site faster, and ensures users on slow connections don’t bounce before your product even loads.
Reduce Image Size with Compression, Not Resizing
It’s worth repeating: resizing and compression are not the same thing.
- Resizing adjusts the pixel dimensions of an image.
- Compression reduces the file size — usually measured in KB — by removing unneeded data.
In Shopify, resizing is mostly automated, but compression is entirely up to you.
Uploading a 2048×2048 JPEG image is fine — in fact, it’s recommended for product images that support zoom features. But if that file hasn’t been compressed, you’re dragging site performance down for no good reason.
What you want to do is:
- Start with the largest, highest-quality image available.
- Run it through a compression tool (TinyPNG, ImageOptim, Hyperspeed, etc.).
- Upload the compressed version.
That’s it. Don’t reduce the dimensions manually unless you absolutely have to. Let Shopify handle sizing, and you focus on reducing the file’s weight.
Want to dig deeper into compression strategies? These 7 smart image optimization tactics for Shopify break down best practices for every type of store.
When Manual Resizing Does Make Sense (Rare but Real Cases)
Are there situations where resizing manually actually helps? Yes — but they’re the exception, not the rule.

Here’s when you might want to do it:
- Custom layouts with fixed dimensions: If your theme hardcodes an image container to 800x600px and you upload a 4000px-wide image, you’re wasting space and weight. Resize to just above the needed size and compress.
- Non-responsive themes: While rare, older themes might not serve resized variants correctly. In this case, manually sizing your images to fit display containers makes sense.
- Non-Shopify use cases: Are you using the same image on a landing page builder, third-party blog, or in email marketing? Resize for that specific use — especially in emails where bandwidth is limited.
But in most Shopify scenarios? Compression is all you need.
Image size impacts not just speed, but visibility — this Shopify SEO guide explains how optimized images support better search rankings and organic traffic.
Choosing the Right Compression Tools
There’s no shortage of image compression tools out there. The best ones balance quality with size reduction — and support batch processing to easily reduce image file size.

Some top picks:
- TinyPNG (web-based, Shopify app): Great for quick uploads or automation.
- ImageOptim (Mac) / FileOptimizer (Windows): Ideal for local compression before uploading to Shopify.
- Hextom Image Optimizer: Excellent for large Shopify catalogs, with backup support.
Look for tools that allow you to:
- Set compression level (lossy vs. lossless)
- Strip metadata
- Handle PNGs, JPEGs, and WebP
And most importantly, test before and after. A side-by-side visual comparison often shows zero difference in quality — but a huge drop in file size.
Common Pitfalls: What to Avoid
Even with a good strategy, some mistakes still trip merchants up:
- Uploading images straight from a phone or camera: These files are massive and full of extra data.
- Relying solely on lazy loading: It delays image loading but doesn’t reduce the weight.
- Over-compressing: Going too far can make your products look low-quality or pixelated. Use visual previews to find the sweet spot.
- Resizing AND compressing to extremes: You don’t need to reduce a 2048px image to 400px — Shopify does that. Just compress the original instead.
Remember: the goal is to reduce image file size without compromising visual quality.
Slow images are just one part of the puzzle — these 10 hidden causes of Shopify speed issues can reveal other silent killers slowing down your storefront.
Build Compression Into Your Workflow
Optimizing images on Shopify isn’t about jumping through hoops or constantly resizing assets. It’s about getting the file size right before you upload — and letting Shopify handle the rest.

Here’s a simple workflow to keep your images light, sharp, and fast-loading:
- Capture a high-resolution image.
- Edit and finalize it visually.
- Compress using a reliable tool.
- Upload to Shopify.
Once this becomes part of your process, your site will load faster, perform better, and convert more — especially on mobile.
Want to take it a step further and automate everything?
Hyperspeed isn’t just an image compression tool — it’s a complete speed optimization app built specifically for Shopify stores. It compresses all your product images automatically using smart, lossless algorithms, but it also goes beyond that:
It defers unused scripts, reduces render-blocking resources, enables lazy loading, and optimizes your theme’s code — all to help your site load faster and rank higher.
If you’re looking for a fully managed way to reduce image file size and boost performance across the board, check out Hyperspeed on Shopify.
Keep your images beautiful. Just make them smaller first — and let smart automation handle the rest.
Compare how fast your store is to a huge sample of other stores. Get benchmarked and find out where you can improve your speed to make more sales. How fast is your Shopify store?
Frequently Asked Questions
How do I reduce image file size in Shopify without compromising quality?
To reduce image size in Shopify, compress photos before upload using an image compression tool. This reduces file size without visible quality loss. Use formats like JPEG or WebP and avoid resizing manually—Shopify handles image dimensions automatically.
Should I manually resize images for Shopify?
No, you don’t need to manually resize to reduce image size. Shopify automatically adjusts image dimensions for different screen sizes. Instead, focus on image compression to reduce file size and avoid quality loss. Compress images online before uploading for best results.
What’s the best way to compress images for Shopify?
Use an image optimizer or compression tool to reduce file size before uploading. Choose lossless compression for high-quality visuals or lossy for thumbnails. Tools like TinyPNG and ImageOptim help reduce image kb while preserving image resolution and clarity.
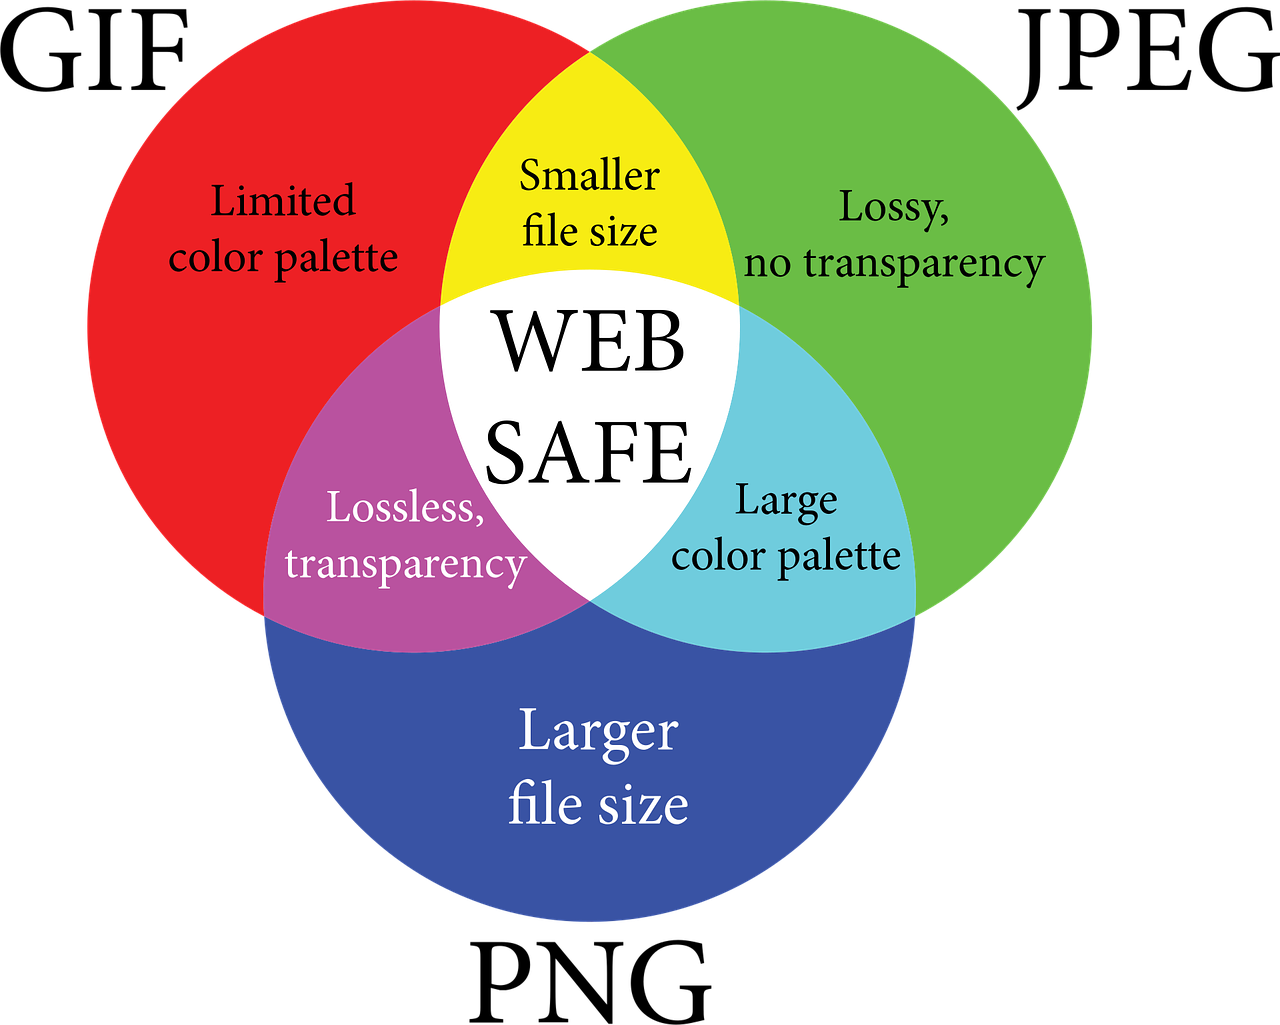
Does JPEG compression or PNG optimization work better for Shopify?
JPEG compression is ideal for photos due to smaller file sizes with minimal quality loss. PNG optimization is best for graphics with transparency. To reduce kb effectively, choose the right image format and compress before uploading to optimize image for web.
Can I bulk resize or compress images in Shopify?
Shopify doesn’t bulk resize or compress images natively. Use an image optimization app that supports bulk resize and compression. These tools compress photos, convert image format, and strip metadata to reduce file size while maintaining image editing flexibility.


